WordPress Tutorial - Using the Editing Icons
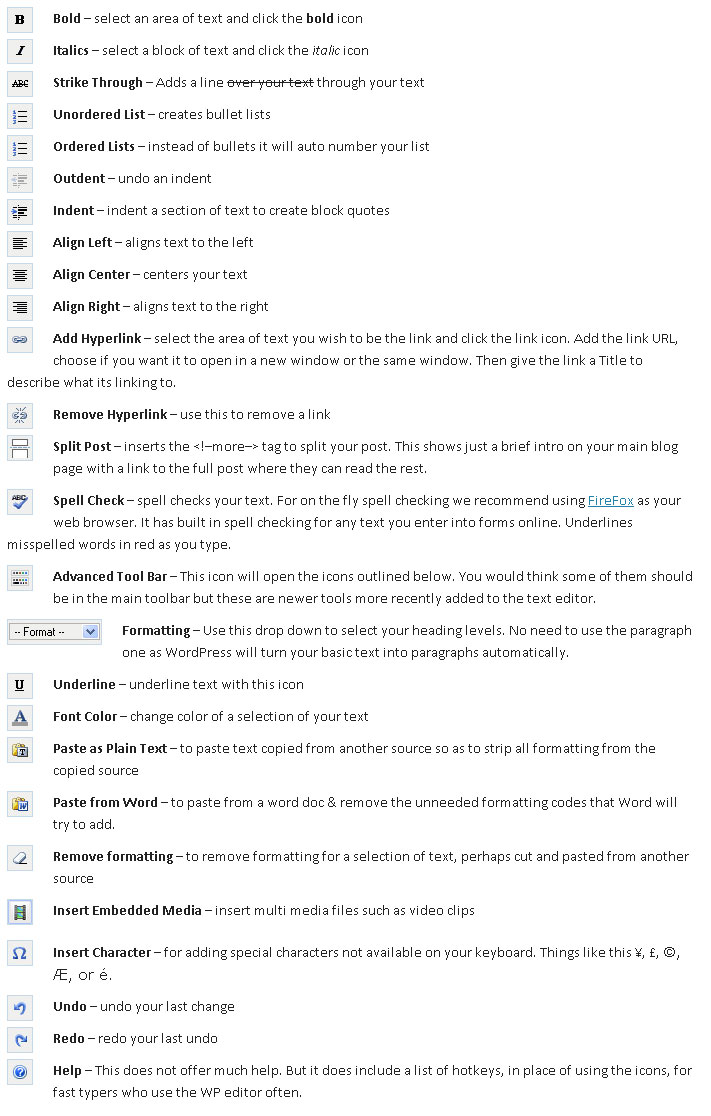
Using the Editing Icons
For most of these icons, to apply the formatting you select your block of text (click and drag with your mouse), then click on the appropriate icon.
Other tools, such as Upload/Insert Images, (above the main editing icons) require you to click on the area of the content where you wish to place the image, then click the icon and enter the information in the pop-up.
It is fairly straightforward, much like using any word processor.
Below, we summarise each Icon.
The Editor Icons
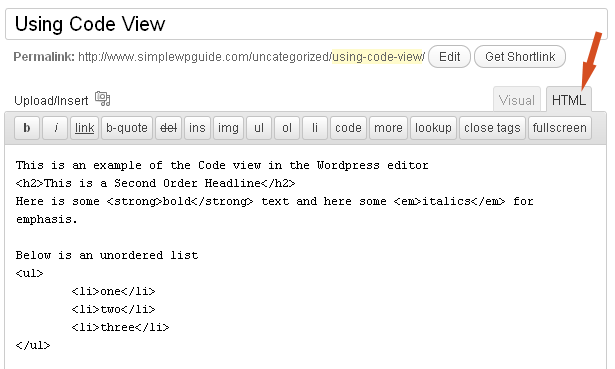
Hand-coded formatting
Should you need to use any HTML (Hyper Text Mark-up Language) coding not covered by the visual editor button you can use the Code view to hand code your Page (see arrow in image below).
This will require some basic knowledge of HTML tags.
Again, do call us if you are trying to carry out some specific editing and the HTML coding is unclear to you.
If you plan to do quite a bit of blogging with your WordPress system, you may want to learn a little HTML so you can have more control over what you are publishing in your posts.
The basics are actually quite simple and easy to learn. By switching back and forth between Visual and HTML views you can get a hang of some of the basics as you go.
Please note that the HTML view does not display paragraph Tags at the beginning and ends of your paragraphs. Instead it insets them dynamically into your Posts as they then get rendered within the browser.